
Welcome to our comprehensive guide on starting seeds indoors! Whether you’re a seasoned gardener or just beginning, this guide is here to walk you through everything you need to know about nurturing your seeds into strong, healthy plants.
Starting seeds indoors offers a world of benefits. For one, it allows you to choose from a vast variety of plants that might not be available as transplants at your local nursery. Plus, it’s a cost-effective way to grow your favorite veggies. Imagine having a bountiful harvest without breaking the bank!
We’ve learned a thing or two from Master Gardeners, and we’re excited to share these insights with you. From selecting the right soil to creating the perfect environment for germination, we’ll cover it all. The key is to provide your seeds with the right conditions—think optimal moisture, temperature, and light.
By the end of this guide, you’ll feel confident in your ability to give your seeds the best start possible. So, let’s dive in and explore the fundamentals of seed starting together!
Key Takeaways
- Starting seeds indoors can save money and expand your plant variety.
- Choosing the right soil and maintaining optimal moisture are crucial for germination.
- Provide seeds with the right temperature and light conditions for successful growth.
- Master Gardeners share practical tips for creating the perfect environment for your seeds.
- This guide covers everything from soil selection to transplanting with confidence.
Seed Starting Fundamentals: Why Grow Your Own Vegetable Transplants?
Imagine holding a tiny seed in your hand, knowing it has the potential to become a thriving plant. Starting your own vegetable transplants indoors is more than just a gardening technique—it’s an opportunity to connect with nature and watch life unfold before your eyes. This process offers numerous benefits, from cost savings to the joy of nurturing your plants from day one.
Benefits of Starting Plants from Seeds
One of the most significant advantages of starting plants from seeds is the access to a wide variety of crops that may not be available as transplants at local nurseries. Whether you’re growing heirloom tomatoes or unique herbs, seeds open up a world of possibilities. Plus, it’s budget-friendly—buying seeds is often cheaper than purchasing established plants.
Another key benefit is the control you gain over the growing process. By starting seeds indoors, you can ensure your plants get the best possible start in life, from the soil mix to the light and water they receive. This control often results in healthier, more robust plants that are ready to thrive once transplanted outdoors.
Common Challenges and How to Overcome Them
Of course, starting seeds indoors isn’t without its challenges. Many gardeners face issues like improper watering and insufficient light. Overwatering can lead to damping off, a fungal disease that can decimate your seedlings. To avoid this, use sterile containers and maintain good airflow around your plants.
Light is another critical factor. Seedlings need adequate light to grow strong and sturdy. If natural light isn’t sufficient, consider using LED grow lights. We’ve found that placing the lights 6-8 inches above the seedlings and keeping them on for 12-16 hours a day works wonders. Proper planning and understanding the specific needs of your seeds, as outlined on the seed packet, can make a huge difference in their success.
By addressing these challenges head-on, you can set your seedlings up for success. The rewards of watching your seeds grow into healthy, vibrant plants make every effort worthwhile.
Seed Starting 101: How to Grow Your Own Vegetable Transplants
Let’s dive into the essentials of growing your own vegetable transplants. It all begins with understanding the science behind germination and the timing needed for successful transplanting.
Understanding Germination and Transplanting Basics
Giving your seeds the right start is crucial. The pot you choose and the mix you use play significant roles in creating the ideal environment for your young transplants. A well-balanced mix ensures proper drainage and nutrients, while the pot size should match the growth stage of your plants.
Timing is everything. Most seeds germinate within 1 to 2 weeks, but some can sprout in as little as 2 to 3 days. Heat can be your ally here—using a heat mat can speed up germination. Maintain soil temperatures between 70-80°F for optimal results.
Once your seedlings have developed strong root systems, it’s time to transplant them. Hardening off is a critical step to acclimate them to outdoor conditions. Start with short exposure and gradually increase their time outside over a week.
Patience and precision are key. Even small steps require attention to detail, from the mix in your pot to the timing of your transplant.
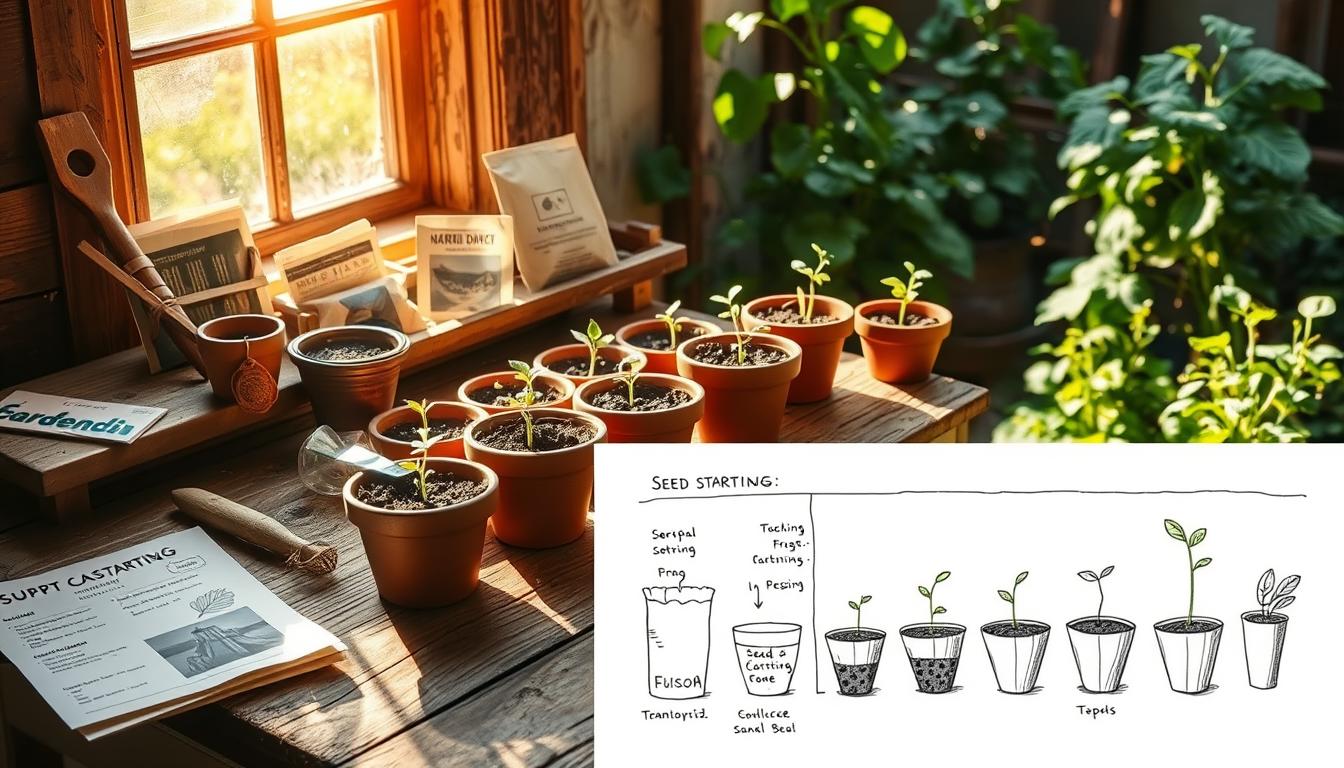
Gathering Your Seed Starting Supplies and Materials
Gathering the right supplies is the first step toward a successful seed starting journey. It’s like setting up a cozy little home for your future plants!
Choosing Containers, Trays, and Cells
When it comes to containers, you want something clean and sturdy. We recommend using trays with cells that hold soil and water effectively. These trays come in various sizes, like 6-packs or 12-packs, giving you flexibility based on how many plants you want to start. Plus, they’re reusable, making them a cost-effective choice.
Selecting the Right Growing Medium
A quality growing medium is essential for healthy root development and proper germination. Opt for a specialized seed starting mix instead of garden soil to avoid diseases. These mixes are designed to drain excess water while retaining just enough moisture. The result? Strong, healthy roots that give your plants a great start in life.
Temperature plays a big role in germination. Using tools like seedling mats or heating mats can help maintain the perfect soil temperature. These mats are especially useful for warm-season crops like tomatoes and peppers, ensuring they get the heat they need to thrive.
Remember, it’s all about creating the right environment. With the right supplies and a little care, you’ll be on your way to growing strong, healthy plants. Happy gardening!
Selecting the Right Seeds and Perfect Timing
Choosing the right seeds is the first step toward a successful harvest. It’s like picking the perfect ingredients for your favorite recipe—each variety brings its own flavor and charm to the table. Whether you’re a fan of juicy tomatoes or crisp broccoli, selecting varieties that thrive as transplants is key to a bountiful harvest.
Tips for Choosing Transplant-Friendly Varieties
When it comes to planting, not all seeds are created equal. Some varieties are bred to excel as transplants, while others prefer to be directly sown into the ground. Tomatoes, for instance, are a classic choice for indoor starts. They love the head start and will reward you with a robust harvest. Leafy greens like kale and spinach are also excellent choices—they’re easy to transplant and can be harvested multiple times.
Always read the seed packet for specific planting depths and timing recommendations. A good rule of thumb is to plant seeds at a depth of 2 to 3 times their size. For example, larger seeds like tomatoes should be planted deeper than smaller ones like lettuce. Cover the seed with just enough soil to ensure proper germination—think of it as giving your seed a cozy blanket to snuggle up in until it’s ready to grow.
Proper planting techniques can make all the difference. Sow your seeds at the correct depth and cover them from the bottom up. This method helps prevent overwatering and encourages strong root growth. Plus, it’s a great way to avoid those pesky fungal diseases that can derail your progress.
Finally, consider your local climate when selecting seeds. Tomatoes, for example, need 6 to 8 weeks of indoor growth before they’re ready to face the outdoors. Make sure to align your planting schedule with your area’s frost dates to give your transplants the best chance at success. With the right variety and a little care, you’ll be enjoying fresh, homegrown food in no time!

Creating the Ideal Seed Starting Environment
Setting up the perfect environment for your seeds is like giving them their own little world to thrive in. It’s all about striking the right balance between light, heat, and moisture. Let’s break it down so you can create a setup that works wonders for your future plants.
Light, Heat, and Moisture Essentials
Light is one of the most critical factors. Natural sunlight is fantastic, but it’s not always reliable. That’s where grow lights come in—especially LED ones. They’re adjustable, so you can tailor the light to your seeds’ needs, keeping them on for about 14-16 hours a day. This consistency helps prevent those leggy seedlings we all want to avoid.
Heat plays a big role too. Most seeds germinate best in temperatures between 70-80°F. Heating mats can be a lifesaver, especially for warm-loving plants like tomatoes. Moisture is equally important—keep the soil damp but not soggy. A good trick is to water from the bottom up to encourage strong root growth and avoid fungal issues.
Setting Up Indoors: Windows vs. Grow Lights
If you have a sunny window, that’s a great spot to start. But if natural light is scarce, LED grow lights are your best bet. They offer precise control and can be adjusted as your seedlings grow. Plus, they’re energy-efficient and come in sizes to fit any space. The key is consistency—maintain steady conditions from week one right through to harvest for the best results.
Proper setup indoors can make all the difference. By controlling light, heat, and moisture, you’ll be on your way to raising sturdy, healthy seedlings ready for the great outdoors.
For more tips on creating the perfect environment, check out our seed starting guide to ensure your seeds get the best start possible.
Step-by-Step Planting and Care Techniques
Now that you’ve gathered your supplies and prepared the perfect environment, it’s time to get your hands dirty. Let’s walk through the step-by-step process of planting and caring for your seeds indoors. With a little attention to detail, you’ll be on your way to raising strong, healthy seedlings.
Proper Seed Sowing and Soil Preparation
Start by pre-moistening your soil mix until it’s as damp as a wrung-out sponge. This helps ensure even moisture without waterlogging the seeds. Next, fill each cell in your tray about three-quarters full with the prepared soil.
Now, it’s time to sow your seeds. Refer to the seed packet for the recommended planting depth. A good rule of thumb is to plant seeds 2 to 3 times deeper than their size. For example, if your seed is about ¼ inch in diameter, plant it ½ to ¾ inches deep. Cover the seed gently but firmly to ensure good contact with the soil.
Once your seeds are in place, it’s important to maintain consistent moisture levels. Check the soil every day to make sure it’s damp but not soggy. Overwatering can lead to fungal issues, so err on the side of caution. As your seedlings grow, you may need to adjust your watering schedule, especially if you’re growing indoors where conditions can change daily.
Thinning and Daily Care
After germination, you’ll likely have multiple seedlings in each cell. To give them room to grow, thin them down to the strongest one or two. Use a pair of tweezers or gently pinch off the weaker seedlings at soil level. This step ensures that your remaining plants have enough space and resources to thrive.
Each day, inspect your seedlings for signs of stress or disease. Proper air circulation and consistent watering will help prevent common issues. For more detailed guidance, check out our seed starting guide to ensure your plants get the best start possible.
By following these simple steps and staying attentive to your seedlings’ needs, you’ll be enjoying fresh, homegrown produce in no time. Happy planting!
Troubleshooting Common Seed Starting Issues
Even with the best preparation, things don’t always go as planned. Let’s tackle some of the top gardening challenges that can pop up when starting seeds indoors.
Preventing Damping Off and Other Fungal Problems
Damping off is a common issue that can wipe out your seedlings quickly. It’s caused by too much moisture and poor air circulation. To prevent it, use sterile containers and ensure good airflow around your plants. Watering from the bottom up can also help reduce the risk of fungal diseases.
Pro tip: If you notice any signs of damping off, act fast. Remove infected plants, improve ventilation, and treat the remaining seedlings with a fungicide. Keeping your greenhouse or growing area clean and well-ventilated is key to preventing these issues.
Managing Leggy Seedlings and Overwatering
Leggy seedlings are another common problem, usually caused by insufficient light. If your seedlings are stretching too much, it’s time to adjust your grow lights. Move them closer—about 6-8 inches above the plants—and ensure they’re on for at least 14-16 hours a day.
Overwatering is another pitfall. Check your soil daily, and only water when it feels dry to the touch. A well-draining mix and proper ventilation will help maintain consistent moisture without saturating the soil. Remember, it’s better to err on the side of caution to avoid losing your plants to root rot.
By staying vigilant and addressing these issues early, you can save your seedlings and set them up for healthy growth. Happy gardening!
Transplanting and Hardening Off for Garden Success
It’s time to help your seedlings make the big move from indoors to the garden. This transition is crucial for their success, and doing it right can make all the difference. Let’s break it down step by step.
When and How to Thin or Transplant Seedlings
Once your seedlings develop their first set of true leaves, it’s time to think about thinning. This means selecting the strongest seedlings and giving them room to grow. Use a pair of clean tweezers to gently remove the weaker ones at soil level. This step ensures that the remaining plants have enough space and resources to thrive.
Acclimating Your Plants to Outdoor Conditions
Hardening off is the process of gradually exposing your seedlings to outdoor conditions. Start by placing them in a shaded area for a few hours a day, then gradually increase their exposure to sunlight and wind over the course of 7-10 days. This helps prevent shock and prepares them for life outside. Keep an eye on the weather and avoid transplanting during extreme conditions.
| Day | Exposure Time | Location |
|---|---|---|
| 1-2 | 1-2 hours | Shaded area |
| 3-4 | 2-4 hours | Partial sunlight |
| 5-7 | 4-6 hours | Full sunlight |
| 8-10 | 6-8 hours | Outdoor garden |
By following these steps, you’ll ensure your plants transition smoothly into their new home. Remember, patience and care during this process will set your garden up for success all year round.

Conclusion
Starting seeds indoors is a journey that’s as rewarding as it is practical. By now, you’ve got the tools and tips to turn those tiny seeds into thriving plants. Whether you’re a seasoned gardener or just starting out, remember that this process is all about nurturing life and enjoying the fruits of your labor.
We’ve covered everything from selecting the right seeds to creating the perfect environment. With a little care, anyone can grow their own transplants at home. It’s a hands-on way to connect with nature and share in the joy of watching your efforts bloom.
Don’t forget to explore more techniques and resources on our gardening page to keep your garden flourishing. Happy growing, and we’d love to hear about your seed starting adventures!
FAQ
How long does it typically take for seeds to germinate?
What soil mix is best for starting seeds indoors?
Can I use a sunny windowsill instead of grow lights?
How much water do seedlings need?
Why are my seedlings leggy and how can I fix it?
How can I prevent damping off in my seedlings?
When is the best time to transplant seedlings outside?
Can I start seeds in any container?
How can I maintain the right temperature without a heat mat?
What if my seeds don’t germinate?
Just a heads-up: This post contains Amazon affiliate links, which means I may earn a small commission (at no extra cost to you) if you choose to make a purchase through them. Every little bit helps support this blog and the work I share here—so thank you for being part of The Good Life Chronicles community. I’m truly grateful!