
There’s something special about baking with a sourdough starter. It’s more than just mixing flour and water—it’s about creating a living, breathing companion in your kitchen. Imagine the joy of watching your starter come to life, bubbling and growing, ready to help you craft delicious, naturally leavened bread. Whether you’re a seasoned baker or just starting out, this guide will walk you through everything you need to know to create and maintain your very own sourdough starter.
With just a cup of flour and a little water, you can embark on this baking adventure. The process is simple, but the rewards are immense. Not only will you enjoy the tangy flavor of sourdough bread, but you’ll also benefit from its nutritional advantages, like enhanced mineral absorption. Plus, your starter can be used in countless recipes beyond bread, from pancakes to pizza crusts.
So, let’s dive in! This guide is here to help you every step of the way, from the basics of feeding your starter to troubleshooting common issues. By the end of this journey, you’ll be a sourdough pro, ready to share your creations with family and friends.
Introduction to Sourdough Bread Starters
Creating a sourdough starter is like welcoming a new friend into your kitchen—one that helps you bake delicious bread. This natural fermentation process has been around for centuries, connecting us to ancient baking traditions. At its core, a sourdough starter is a mixture of flour and water that ferments, creating a bubbly, tangy culture.
Historically, bakers relied on wild yeast and bacteria to leaven bread. Today, we use this same principle. The key to a thriving starter is using the right water temperature and quality ingredients from day one. This ensures confident fermentation and a robust starter.
While it might seem mysterious, with the right guidance, your starter becomes a trusted companion. This guide will walk you through every step, making the process accessible and enjoyable. Whether you’re new to baking or looking to refine your skills, you’ll find everything you need here to create a healthy, active starter.
Understanding Your Starter’s Science and Benefits
Ever wondered what makes a sourdough starter so special? It all comes down to a tiny ecosystem of wild yeast and bacteria. These microorganisms work together to ferment your starter, creating the bubbles that make your bread rise and the tangy flavor we all love.
At the heart of this process is lactic acid fermentation. The bacteria in your starter convert sugars into lactic acid, giving sourdough its characteristic sourness. Meanwhile, the yeast produces carbon dioxide, which gets trapped in the dough, creating those beautiful air pockets. Over time, this natural process not only enhances flavor but also makes the bread easier to digest.
One of the most amazing things about sourdough is how it develops over time. As your starter matures, the balance between wild yeast and bacteria shifts, deepening the flavor. This slow fermentation also breaks down some of the bread’s phytates, making nutrients like iron and zinc more accessible. It’s a perfect blend of science and tradition!
Essential Ingredients and Tools for a Successful Starter
Starting your sourdough journey begins with the right ingredients and tools. Let’s break it down simply:
Quality Flour: Choose whole wheat, rye, or unbleached all-purpose flour. These options provide the nutrients your starter needs to thrive.
Water: Use fresh, filtered water at room temperature. Avoid chlorinated water, as it can slow fermentation.
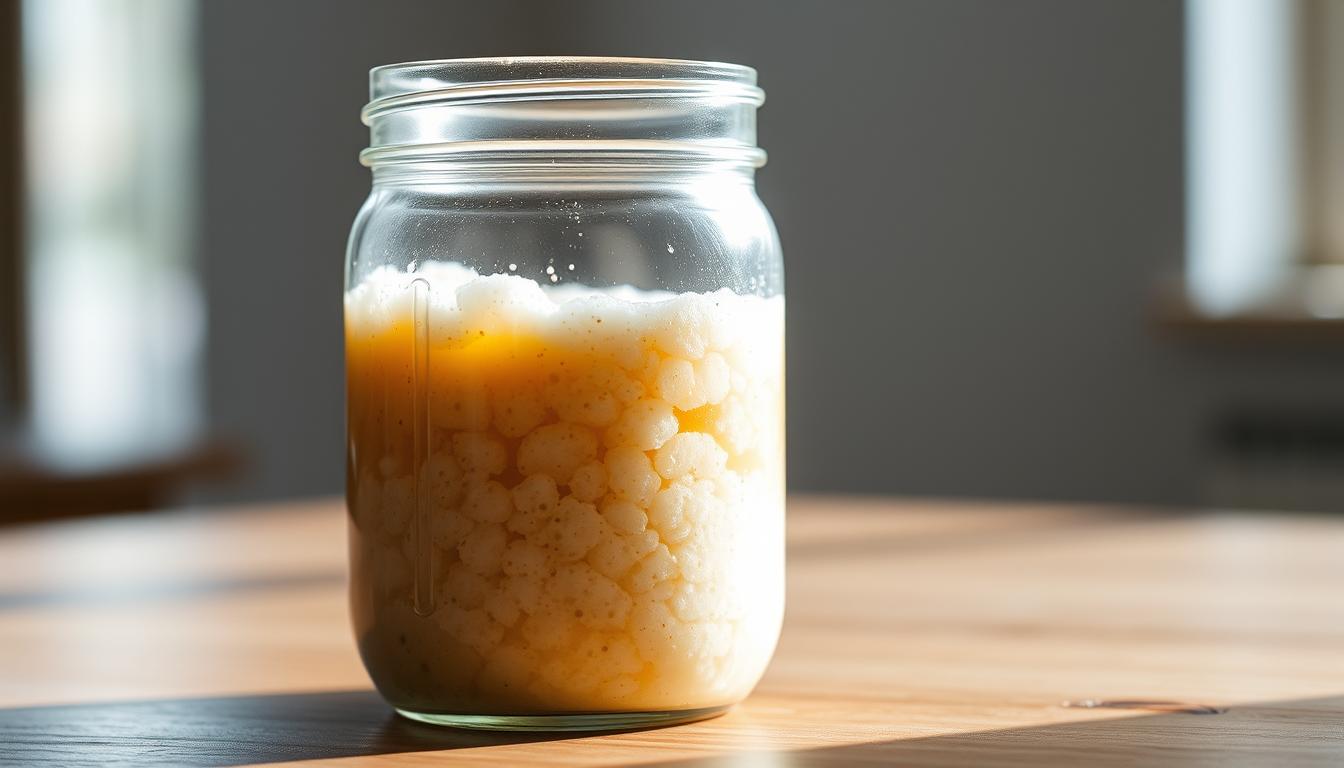
Container: A clear glass or ceramic jar with a wide mouth is ideal. It lets you monitor your starter’s progress and makes mixing easier.
Mixing Tool: A wooden spoon or silicone spatula is perfect for gently incorporating ingredients without damaging the starter.
Your kitchen environment plays a big role too. Keep your starter on the counter at room temperature (around 70-75°F) for active fermentation.
Remember, the right ingredients and tools set the stage for a healthy, active starter. With these basics, you’re ready to create something amazing!
How to Create Your Sourdough Starter: Day-by-Day Guide
Ready to embark on the exciting journey of creating your own sourdough starter? Let’s break it down into simple, manageable steps. From the initial mix to a mature starter, we’ll guide you through each day with care and enthusiasm.
On Day 1, it all begins with a simple mix of flour and water. Combine 60 grams of whole wheat flour with 60 grams of filtered water. Let it rest for an hour, allowing the magic to start. By the end of the day, you’ll notice the first signs of life—tiny bubbles forming on the surface.
As we move into Days 2 and 3, the process involves daily feedings. Each morning, discard half of your starter and add another 60 grams of flour and 60 grams of water. This routine helps balance the natural yeast and bacteria, creating a robust foundation for your starter. By Day 4, you’ll start to see significant growth, with your starter doubling in size after each feeding.
Days 5 to 7 are all about consistency. Continue feeding your starter once a day, and watch as it becomes bubblier and more vibrant. By the end of Day 7, your starter should be active, almost double in size, and ready to use in your favorite recipes. Remember, patience is key—each day brings you closer to baking delicious, naturally leavened bread.
Stick to this method, and you’ll be rewarded with a healthy, thriving sourdough starter. Happy baking!
Decoding Starter Activity and Sensory Cues
Understanding your sourdough starter’s behavior is like learning a new language—once you grasp the basics, it all starts to make sense. Let’s break down the key signs to look for.
Bubbles are a clear indicator that your starter is active and healthy. The more bubbles you see, the better it’s fermenting. If your starter is fed recently, you might notice a slight increase in activity, which is a good sign. Over time, you’ll get a feel for what’s normal and what might need a little adjustment.
Another important cue is how much your starter rises. A thriving starter should almost double in size after feeding. If it’s sluggish, it might need a bit more attention. Place the starter on your counter and let it rest for an hour or two—this will give you a clear picture of its activity level.
Don’t forget to check the dough’s texture and consistency. After a few hours on the counter, it should feel smooth and slightly springy. If it’s too sticky or dry, it might be a sign to adjust your feeding schedule. Remember, every starter is different, so it’s all about finding the right rhythm for yours.
By paying attention to these sensory cues, you’ll become a pro at reading your starter’s signals. Happy baking!
Thinking about a sourdough bread starter, heres all you need to know
Starting a sourdough journey is an exciting adventure that connects you with centuries of baking tradition. This guide covers everything from creating your starter to baking delicious bread, ensuring no question is left unanswered.
Creating a sourdough culture from scratch is a rewarding process. It involves trial, observation, and care, but the end result is well worth the effort. Every feeding and every loaf contributes to a more resilient starter.
Naturally fermenting bread is an art that requires patience and attention. This guide explains every step, from feeding to baking, so you can enjoy the process without confusion.
We understand that making sourdough can be a learning curve. That’s why we’ve included practical insights and shared experiences to make your journey smoother. Trust the process, and you’ll soon be baking like a pro!
Adapting Your Feeding Routine for Optimal Growth
Feeding your sourdough starter is an art that requires a little flexibility. Just like any living creature, your starter has its own rhythm, and adjusting its feeding schedule can make a big difference in its health and performance. Whether you’re baking every day or just once a week, there’s a feeding routine that works perfectly for you.
When your starter is young, it thrives on frequent feedings—usually twice a day. But as it matures, you can slow things down. For instance, if you’re baking regularly, stick to a daily feeding schedule. If you’re taking a break, you can feed your starter once a week and store it in the fridge. This flexibility is key to maintaining a happy, active starter.
Here’s a tip: if you’re planning to bake within the week, keep your starter on the counter and feed it daily. If you won’t be baking for a while, transfer it to the fridge and feed it once a week. This way, your starter stays healthy without over-fermenting. Remember, the goal is to find a balance that works for you and your baking routine.
Another important aspect is adjusting the amount of flour and water during each feeding. A general rule of thumb is to use a 1:1:1 ratio (starter:water:flour). For example, if you have 50 grams of starter, add 50 grams of water and 50 grams of flour. This ratio ensures your starter stays strong and active, ready for your next baking adventure.
By adapting your feeding routine to your starter’s needs and your baking schedule, you’ll maximize its performance and enjoy better results with every loaf. Happy baking!
Optimizing Flour-to-Water Ratios with Practical Conversions
Finding the perfect balance between flour and water is the secret to a thriving sourdough starter. A 1:1 ratio by weight (100% hydration) is ideal, but converting this into cups can be tricky. Here’s a simple rule of thumb: 1 cup of flour typically weighs around 120 grams, so aim for a similar amount of water.

When starting, use a small amount of each—like half a cup of flour and half a cup of water. As your starter grows, you can easily scale up. For accuracy, consider using a digital scale, but if you’re measuring by volume, a kitchen scale can help you get the hang of it.
Remember, precision matters. Using too much water can make your starter too runny, while too little might make it dry. The goal is a smooth, thick batter consistency. Experiment with your mix until you find the sweet spot, and don’t be afraid to adjust as needed.
By mastering this ratio, you’ll set your starter up for success. Happy baking!
Maintaining Your Sourdough Starter Over Time
Maintaining a sourdough starter is a journey that requires consistency and care. It’s about building a daily routine that keeps your starter healthy and ready for baking. With the right practices, your starter can thrive for years, becoming a trusted companion in your kitchen.
Daily feeding is the cornerstone of starter maintenance. Feed your starter once a day if it’s on the counter, using a 1:1 ratio of flour to water. For example, if you have 50 grams of starter, add 50 grams each of flour and water. This keeps it active and robust.
Another key step is discarding a portion of your starter before feeding. This helps maintain the right balance of yeast and bacteria. Over time, you’ll develop a sense of when your starter needs attention, whether it’s more frequent feeding or a bit of rest in the fridge.
Consistency and time are your best allies. Keep your starter at room temperature (around 70-75°F) for active fermentation. If you’re not baking daily, store it in the fridge and feed it once a week. This flexibility ensures your starter stays vibrant, even with varying schedules.
Embrace the routine as part of the joy of sourdough baking. With proper care, your starter will reward you with delicious, naturally leavened bread for years to come. Happy baking!
Short-Term and Long-Term Starter Storage Strategies
Storing your sourdough starter is just as important as feeding it. Whether you’re taking a short break or planning for the long haul, we’ve got you covered with these practical storage tips.
For short-term storage, the fridge is your best friend. Place your starter in a tight container and refrigerate it. It can stay there for up to a week without any issues. This is perfect if you’re not baking regularly but still want to keep your starter alive.
If you’re looking for a long-term solution, drying your starter is a great option. Simply spread it on parchment paper and let it dry completely. Once dry, store it in an airtight container. This method ensures your starter stays viable for months, and it’s easy to revive when you’re ready to bake again.
When you’re ready to use your starter again, whether it’s been in the fridge or dried, the process is straightforward. For a refrigerated starter, let it come to room temperature, discard half, and feed it. For a dried starter, rehydrate it with water and flour, then feed it as usual. Remember to be patient—your starter might need a little time to regain its full activity.
Lastly, don’t let any starter go to waste. If you have excess, you can store it in the fridge or dry it for later use. This way, you’ll always have a backup ready whenever you need it.
Reviving and Strengthening Your Starter for Baking
Is your sourdough starter looking a bit lifeless? Don’t worry, reviving it is easier than you think! With a little care and patience, you can bring it back to its former glory. The key is to start with small, consistent feedings to help it regain its strength.
Begin by discarding most of your starter, leaving just a small amount—about 2 tablespoons. Then, feed it with equal parts of flour and water. For example, mix in 45 grams of flour and 45 grams of water. Let it rest at room temperature for about an hour to kickstart the fermentation process. Repeat this feeding every 12 hours, and you should start to see bubbles forming within a few hours.
As you feed your starter, monitor its activity. Look for signs like a doubling in size and a tangy aroma. These are clear indicators that your starter is ready for baking. Remember, patience is key. It might take a day or two, but with consistent feeding, your starter will be vibrant and active again.
Once your starter is lively and bubbly, it’s time to incorporate it into your dough. The yeast activity should make the dough elastic and smooth. With a little time and attention, your starter will be the heart of your baking, helping you create delicious, naturally leavened bread.
Integrating Starter into Your Baking Process: From Levain to Loaf
Now that your sourdough starter is active and bubbly, it’s time to put it to work! The journey from levain to loaf is an exciting process that requires precision and patience. Let’s break it down step by step.
Start by creating a levain—a mixture of your matured starter, flour, and water. This pre-ferment helps build flavor and strength in your dough. Mix equal parts of starter, flour, and water in a clean container. Let it rest at room temperature for about an hour until it becomes frothy and active.

Next, it’s time to scale your dough. Combine the levain with more flour, water, and a pinch of salt. Mix everything gently until just combined. Avoid overmixing to keep the dough tender. Cover it with a damp cloth and let it rest for 30 minutes to an hour—this is called the autolyse phase.
After the autolyse, perform a series of gentle stretches and folds to develop the dough’s strength. Do this 4 times over the first 2 hours of bulk fermentation. Place the dough in a lightly oiled container, cover it, and let it rise in a warm, draft-free spot. The dough should increase in volume by about 50-75% during this time.
Once the dough has risen, shape it gently into your desired loaf. Place it into a proofing basket or onto a parchment-lined baking sheet. Cover it with plastic wrap or a clean towel and let it rest for another 30 minutes to an hour. This final rise is crucial for achieving that perfect oven spring.
When you’re ready to bake, preheat your oven to 450°F (232°C). Place the dough into the oven, and after 20-30 minutes, reduce the temperature to 400°F (204°C). Bake for an additional 15-25 minutes, or until the internal temperature reaches 205-210°F (96-98°C). The result will be a golden-brown loaf with a crispy crust and a soft, airy interior.
Remember, timing and temperature are key. Keep an eye on your dough throughout the process, and don’t hesitate to adjust as needed. With practice, you’ll master the art of transforming your starter into a delicious loaf of sourdough bread. Happy baking!
Troubleshooting Common Starter Issues
Every sourdough journey has its ups and downs, and it’s completely normal to hit a few bumps along the way. Whether your starter is sluggish, smells off, or just isn’t bubbling like it should, we’ve got you covered with some tried-and-true solutions to get things back on track.
Lack of Bubbles? If your starter isn’t showing those lovely bubbles, it might be struggling to find its rhythm. This often happens when the room temperature is too cool. Try moving your starter to a warmer spot—around 75-85°F—and give it a good feeding. Sometimes, all it needs is a little TLC to wake up and start fermenting again. If you’re in a hurry, you can even feed it twice a day to give it an extra boost.
Foul Odor? If your starter has an unpleasant smell, it’s probably gone too long without feeding. Hooch—a dark liquid layer on top—is a sign it’s hungry. Simply discard half of your starter and refresh it with equal parts flour and water. This resets the balance and gets rid of that unwanted aroma. Remember, a healthy starter should smell tangy but not sour or unpleasant.
Slow to Rise? If your starter isn’t rising as expected, it might need more time to mature. Be patient and stick to your feeding schedule. If you’re using a new type of flour, it could also be adjusting to the change. Over time, your starter will adapt and become more robust. If it’s still struggling after a few days, try a higher ratio of flour to water to see if that helps.
Remember, every setback is part of the learning process. Even if things seem off track, your starter can always be revived with a little care. Keep experimenting, and soon you’ll be baking like a pro!
Innovative Uses for Sourdough Starter Discard
Who knew that something as simple as sourdough discard could unlock a world of culinary creativity? That small amount of leftover starter is more than just waste—it’s a gateway to delicious treats that add a unique tang to your baked goods.
Let’s start with a classic: pancakes. A small amount of discard mixed with flour, eggs, and milk creates a fluffy, flavorful breakfast. It’s a great way to use up your starter and enjoy a tasty meal. The best part? You can customize it with add-ins like chocolate chips or blueberries for extra flavor.
But pancakes are just the beginning. Waffles, flatbreads, and even pizza dough can all benefit from a bit of discard. For waffles, simply mix your starter with flour, eggs, and a touch of sugar for a crispy exterior and a light interior. Flatbreads become more flavorful with a small amount of discard mixed into the dough, perfect for snacking or as a base for your favorite toppings.
Feeding your starter doesn’t have to be a chore. Why not mix some discard into your favorite recipes for added depth? From savory crackers to sweet cinnamon rolls, the possibilities are endless. Each recipe not only reduces waste but also infuses your creations with that unmistakable sourdough tang.
So next time you’re about to toss that discard, think again. With a little creativity, it can become the star of your next meal. Explore these recipes and discover how easy it is to turn something simple into something extraordinary. Your taste buds—and the planet—will thank you!
Learn more about how to use sourdough discard in your recipes.
Creative Applications: Elevating Everyday Baking with Sourdough
There’s a whole world of creativity waiting beyond the loaf when it comes to sourdough. Imagine infusing your favorite recipes with that tangy, slightly sour flavor we all love. From sweet treats to savory delights, your sourdough starter can be the secret ingredient that takes your baking to the next level.
Let’s start with something sweet. Sourdough can add a unique twist to cakes and muffins. Try substituting a small amount of your starter for some of the flour and water in your favorite recipe. The result? A moist, flavorful base that’s anything but ordinary. And why stop there? Even savory dishes like pizza dough and crackers can benefit from a spoonful of that sourdough magic.
One of the most important things to keep in mind is balance. When incorporating sourdough into your recipes, start with a small part of your starter—maybe 25% of the total dough weight. This ensures the flavor enhances without overwhelming the other ingredients. Over time, you can experiment with larger proportions to find your perfect balance.
Here’s a pro tip: keep a separate starter specifically for baking experiments. This way, you can play around without worrying about affecting your main starter. And don’t be afraid to get creative! Add herbs to your sourdough crackers or a drizzle of honey to your sourdough pancakes. The possibilities are endless, and the fun is all part of the journey.
So, why not give it a try? Grab your mixing bowl, and let your sourdough starter inspire you to think outside the bread box. Who knows what delicious creations you’ll come up with? Happy baking!
Final Thoughts on Crafting a Perfect Sourdough Starter
As we wrap up this guide, remember that crafting a perfect sourdough starter is a journey, not a race. Time, consistency, and a bit of patience are your most powerful tools. Every feeding, every rise, and every adjustment you make is a step toward creating something truly special.
Your starter is more than just a mixture of flour and water—it’s a living, breathing companion in your kitchen. By sticking to a consistent method and paying attention to the amount of flour and water you use, you’ll set your starter up for success. Keep it at room temperature and feed it regularly, and you’ll be rewarded with a robust, active starter that’s ready to help you bake delicious bread.
Don’t be afraid to experiment and make the process your own. Every baker’s method is a little different, and that’s what makes sourdough so unique. Whether you’re baking every day or just once in a while, the key is to find a rhythm that works for you and your starter.
So, go ahead—share your creations, enjoy the journey, and take pride in every loaf. With this guide as your foundation, you’re ready to embrace the world of sourdough with confidence. Happy baking!